

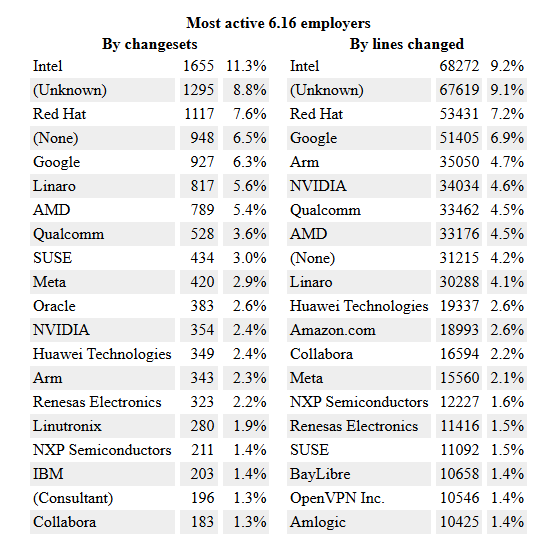
Contributing to the Linux kernel can seem complex and intimidating. Following the established process for sending patches to the Linux kernel mailing lists is essential to land your changes successfully and become further involved in the community. Linaro has a long track record of contributing to the Linux kernel and is frequently listed as one of the top ten contributors to the Linux kernel (as can be seen below in LWN’s development statistics from the 6.16 Linux kernel release). Many of our engineers have also become an integral part of the community: they handle maintainer duties such as reviewing and applying patches sent by others.
In this three-part blog series, we will share our experience and know-how, walking you through everything you need to know to write your first patch and become a trusted member of the community. We will break down the entire journey into three blog posts:
- Part 1 (this post): Posting Your First Patch. We’ll start with the most critical step: how to prepare, format, and post your patches. Getting this right is the foundation for everything that follows.
- Part 2: Navigating the Review Process. Next, we’ll discuss how to handle mailing list reviews. You’ll learn how to interpret feedback, revise your work, and collaborate effectively to get your patch merged.
- Part 3: Becoming a Core Contributor. In the final post, we’ll explore how to contribute beyond writing your own code by reviewing patches from others, and discuss what the path toward becoming a trusted reviewer or even a subsystem maintainer looks like.
Let’s get started with preparing your first patch!
Step 1: The philosophy behind a kernel patch
The Linux kernel is a large project, and as such, all patches must conform to a specific format and mindset. This process begins even before writing a single line of code. You should always consider the relevance of your changes for the upstream kernel before submitting them!
The “upstream” kernel is the main, official version that serves everyone. Every change must be a benefit for the community as a whole, not just for you or your company. Before you start, ask yourself:
Does my change solve a problem that others could experience?
Your change is likely relevant for upstream if it:
- Fixes a verifiable bug. This could be a crash, a security flaw, incorrect behavior, or a performance regression.
- Adds support for new hardware. If you get a new device working, chances are someone else has that device too.
- Improves performance or reduces complexity. Patches that make the kernel faster, smaller, or easier to read are almost always welcome.
- Removes dead or unused code. Deleting code is a fantastic way to contribute, as it reduces the kernel’s maintenance burden.
Your change is not relevant if it is (for example):
- A quick hack that only works on your specific, highly customized machine.
- A feature that only benefits a proprietary, closed-source application.
- A change that knowingly breaks functionality for other users or hardware.
- A fix for a problem that exists only in a distribution kernel or a modified vendor kernel.
If your change only benefits you, that’s fine - but then it belongs in your local tree, not upstream.
Step 2: Set up your toolkit
There is little that divides kernel developers as much as the set of tooling they use for development. Everyone has their own favorite editor, email client, and scripts. You are free to use whatever tooling helps you to get your work done, as long as the result you submit to the kernel mailing lists conforms to the process.
Ensuring that your patches are correctly formatted for email submission is a common failure point for new contributors. Patches with incorrect formatting will cause delays in the submission process and take up precious time from the busy maintainers. Nowadays, many of the technical aspects can be automated using Git and b4, which help with preparing your patch series, sending it, and revising it based on the review feedback you will receive later. Both tools are packaged for many distributions, so you can likely install them directly using your preferred package manager. b4 is also available from the Python Package Index (PyPI) and can be installed using pip:
pip install --user b4To configure Git, make sure that you set your correct identity. In most cases this should be your real name:
git config --global user.name "Your RealName"
git config --global user.email "your.email@example.com"
To configure Git and b4 for submitting patches via email there are two different options: You can use your own SMTP server, or you can use the web submission endpoint. The web submission endpoint helps, especially if you are worried that your email server will mangle submitted patches. This can often happen for example for corporate email servers that add footers with confidentiality notices or similar. It is essential that the generated plain text patches are submitted exactly how they were generated, so use the web submission endpoint if you are unsure.
The b4 configuration has detailed step-by-step instructions for both options, so we omit it here for brevity. Please ensure that you follow the steps carefully. https://b4.docs.kernel.org/en/latest/contributor/send.html
Step 3: Prepare your branch
The b4 workflow is focused around topical branches named “b4/<topic-name>”. You create one branch for each of the patch series you want to send. This branch will always have the latest version of the patches you are working on. If you are revising your patches, you will also make your changes in this branch. To create a new branch and start a new submission, you should first check out the base branch you want to use in your local Linux repository. This should usually be the “next” branch of the maintainer you are targeting. If the target subsystem does not provide a -next branch, you can fall back to the latest linux-next tag:
git remote add next https://git.kernel.org/pub/scm/linux/kernel/git/next/linux-next.git
git fetch next master
git checkout next/master
Now you can create your new topic branch using the “b4 prep” command inside your kernel tree:
Please note that the <topic-name> will end up being public on the mailing list! It will be used to refer to your patch series. Do not use internal code or project names.
Step 4: Make your changes
Now that b4 has created a branch, you can commit individual changes to the topic branch. How you structure your changes and commits on this branch is just as important as the code itself. The goal is to present a series of changes that is logical, focused, and easy for a busy maintainer to review.
Keep your commits atomic
Each commit you make on your topic branch will become a single patch file in your series. Therefore, every commit must be “atomic”: it must do one logical thing, and do it completely. Mixing unrelated changes into a single commit makes your work difficult to review and debug. Ask yourself:
Can I describe this commit’s purpose without using the word “and”?
For example: If you need to refactor a function significantly to add a new feature you need two commits: one to make the refactoring, and one to add the new feature.
Just as importantly, “atomic” also means that each commit must be self-contained and result in a fully functional kernel. Once your series has been applied and merged into the kernel, other developers may use “git bisect” to automatically search through thousands of commits to pinpoint the exact one that introduced a bug. If a commit in the middle of your series breaks the build or causes a regression, “git bisect” will fail, wasting hours of debugging time.
Keep your patch series focused and limited to a reasonable size
Just as a single commit should have a single purpose, your entire patch series (everything on your topic branch) should also be focused on a single topic. For example, a series that adds a new USB feature should not also contain an unrelated documentation fix for a filesystem. Even within a subsystem, it is discouraged to add a patch which touches more than one driver, unless it is a subsystem-level cleanup which can be merged as a single commit.
Fixes should come first in a patch series, so that they can be applied independently before the rest of your series. Avoid creating very large patch series (> 15 patches). These will likely be reviewed very slowly, if at all. A smaller, clearly focused series is much more likely to get prompt feedback.
If you plan to submit a very large series, it is a good idea to discuss your approach on the mailing list first.
Step 5: Describe your changes
With your code changes organized into atomic commits, the next step is to describe your work. This is not just a formality; it is the most important part of your submission. Your commit messages and cover letter tell the story of your patch series, explaining to reviewers and future developers why your changes are necessary. Clear explanations are essential for getting your work reviewed and accepted.
Each commit requires a message that follows a strict, well-defined format. This message has three parts:
-
Subject: This is a one-line summary of what the patch does. It’s the first thing a reviewer sees in their inbox. The format for this is “subsystem: Short, imperative summary of the change”, for example
“arm64: dts: qcom: x1e80100: Fix USB interrupts”. If you are unsure which prefix to use, check what prior commits to similar files used. -
Body: After the subject line comes a blank line, followed by the body of the message. Here you explain your change in detail. Focus on the “why”, rather than the “how”:
- Describe the problem. Why is this change needed? What was the problematic behavior?
- Describe your solution. How does your change fix the problem? Explain the logic of your approach.
- Describe any testing you performed. This helps build confidence that your patch will not introduce new regressions.
-
Tags: At the end of the commit message there are machine-readable tags:
- Signed-off-by:
"Your RealName <your.email@example.com>". This tag is always required at the end of the patch. With this line you certify that you wrote the patch yourself or have the right to pass it on as an open-source patch. Please read the instructions and the “Developer’s Certificate of Origin” carefully before adding this line. - Fixes:
<commit hash> (“original commit message”). If you fix a bug, please inspect the Git history to determine which commit originally introduced the bug and mention it in your commit message. This simplifies backporting the fix to stable releases later. The “git blame” command is often helpful for this. - Reported-by:
"Reporter RealName <reporter.email@example.com>". Use this to give credit to the person who initially reported the bug. - Link: https://lore.kernel.org/r/…/
Use this to link to prior discussions or bug reports.
- Signed-off-by:
-
Footer: Everything written below a “---” line in the commit message will not end up getting applied to the kernel commit log. Use this space to provide additional comments about your patch. If you are uncertain about a certain part of your patch or would like to ask questions, indicate this here.
If you want to make changes to prior commits, reorder them or similar, you can simply use “git rebase --interactive” inside the b4 topic branch.
Note: It might be tempting to use an AI tool to generate a commit message. Do not do this. Your commit message is proof of your personal understanding of the change. Maintainers are reviewing both your code and your ability to explain it. A long, generic, AI-generated message that misses the core technical reason for the change is a clear signal that you may not fully understand your own patch. A short, simple, and accurate message written by you is infinitely more valuable. Trust is the cornerstone of the community, and it is earned only by demonstrating an honest understanding of your own changes.
If your submission contains more than one patch, you must include a “cover letter” (PATCH 0/N). Its purpose is to introduce your series as a whole. You can easily edit it using the following command:
b4 prep --edit-coverThis will open a template in your editor, where you can describe your series. Some maintainers integrate it into the commit log when merging changes.
If your series depends on other patches on the mailing list that are not merged yet, b4 supports marking those as machine readable prerequisites. This is helpful for users trying to test your patches, but use this with caution. A large number of prerequisites is hard for maintainers to keep track of. It is often easier to tackle one problem at a time, and send subsequent series later. If you would like to provide the full picture for a larger piece of work, it is good practice to provide a link to a Git repository with the full set of patches required to test your changes (and instructions for how to test them).
Step 6: Identify reviewers
With your changes structured and described, the next step is to identify which maintainers need to review it. Sending a patch to the wrong mailing list or forgetting to include a key maintainer is a sure way for it to get lost. Historically, this involved manually running scripts like “get_maintainer.pl”, nowadays b4 can automate this task. Run the following command in your topic branch:
b4 prep --auto-to-ccThis will modify the cover letter of your series and add maintainers and reviewers as “To:” and “Cc:” entries there. Review the list of reviewers in the cover letter (“b4 prep –edit-cover”). If you have a large number of recipients listed, this could be an indication that your patch series is too large or spans too many subsystems. Prefer sending small patch series focused on a single subsystem when possible, since this will reduce coordination effort for the maintainers.
Step 7: Check your changes
There is one final, critical step before sending: validating your changes. Submitting a patch that fails basic checks or breaks the build will waste everyone’s time. Always run these checks yourself before sending out patches:
- Build: Make sure your changes build correctly without compile warnings. Build new code with “make W=1 C=1” to perform additional checks. It is a good practice to compile each commit in a series to ensure bisect never breaks.
- Boot: Make sure your changes work correctly, not just on your target device, but also do not break functionality for any other device supported upstream. If needed, ask others for help with testing up front or note that additional testing would be appreciated in your patch.Also, make sure you test your changes on upstream and not some old vendor kernel. For example, follow this guide to test your changes: Booting the Mainline Linux Kernel on Qualcomm Devices
- Style-check: Run
“b4 prep --check”to perform basic style checks. Ensure there are no ERRORs or WARNINGs. - Subsystem-specific checks: Look for additional checks expected when contributing to certain subsystems. For example, if you are submitting device tree changes or bindings, make sure to run the DT checks. See: Tips and Tricks for Validating Devicetree sources with the Devicetree Schema
Step 8: Send your changes
Now that your changes are ready, all that is left is to send your changes to the mailing lists. The b4 tool makes this simple and safe:
b4 sendBefore confirming and sending out the patches, run the command with the “—dry-run” option to see exactly which emails the b4 tool will send out. If you would like to send a preview just to yourself before sending out the patches you can use the “—reflect” option. You can also use the “—preview-to” option to send out a draft to some of your colleagues.
Next steps
Congratulations! Your patch series is now on its way to the kernel mailing lists for review. Your part of the submission process is complete. It’s now time to be patient. Maintainers are often busy and may be in different time zones. It can take anywhere from a few hours to a week or more to receive feedback. In the next post in this series, we will cover how to handle that feedback and navigate the review process.